Molly Maid offers these expert tips for cleaning brass, ensuring your items shine without damage.
|
Brass adds a touch of timeless elegance to our homes, elevating fixtures like doorknobs and lighting to decorative accents and musical instruments. But keeping its luster requires a little TLC. Whether you want to restore shine as part of your spring cleaning goals or need to include buffing out your brass items into your weekly routine, proper brass cleaning makes a visible (and satisfying!) difference.
Table of Contents:
Why Cleaning Brass Matters
Uncared for brass can develop tarnish. A dull, often greenish layer that hides its natural shine not only detracts from its beauty but can also signal the onset of corrosion. Regular cleaning removes tarnish, prevents further damage, and allows the warm glow of brass to truly take center stage.
The Brass Cleaning Challenge
The challenge lies in finding the right cleaning method for your specific brass item. Different types of brass have varying levels of resilience, and the cleaning approach needs to consider this along with the severity of the tarnish.
The good news is there's a range of cleaning solutions available. You can explore DIY methods using household ingredients like vinegar and ketchup, or opt for store-bought brass cleaners formulated for specific needs.
Common Brass Household Items
Brass adds a touch of warmth and sophistication to a home, appearing in a surprising number of places.
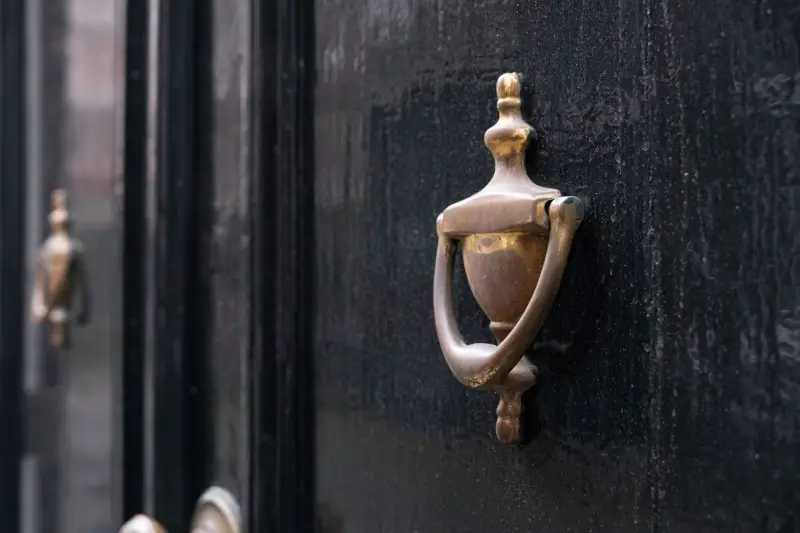
- Door Knobs: Brass door knobs, levers, knockers, hinges, and other hardware bring timeless elegance to entryway or interior doors.
- Hardware: Drawer pulls, cabinet handles, and hinges in brass can elevate the look of your kitchen and bathroom cabinets, consoles, buffet hutches, storage cabinets and beyond.
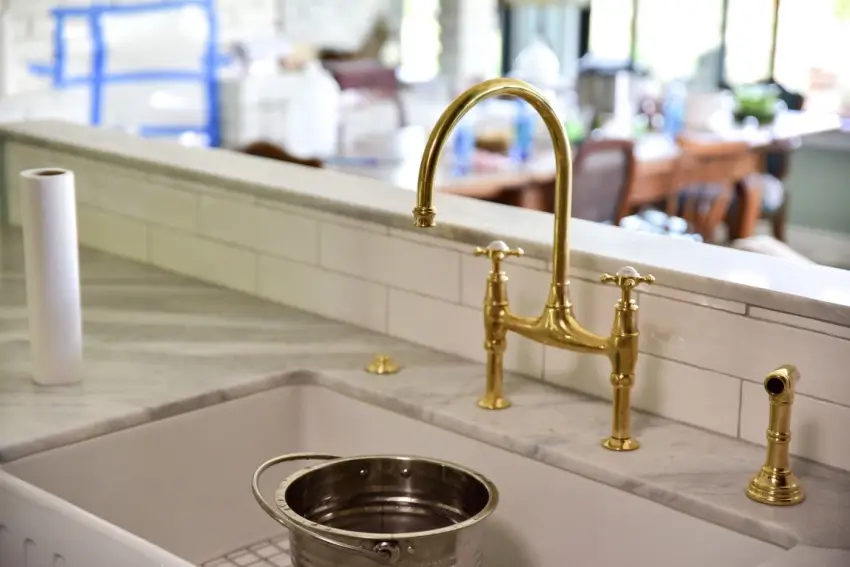
- Fixtures: From faucets in your kitchen over shower heads in your bathroom to light fixtures and fireplace surrounds, brass adds a touch of class.
- Decorative Accents: Vases, sculptures, picture frames, and even fireplace tools can all be crafted from brass, adding a warm metallic touch to your décor.
Why Keep Your Brass Shiny?
Beyond aesthetics, there are a few reasons why you might want to keep your brass clean and shiny:
- Preserves the Finish: Regular cleaning removes tarnish, a dull, often greenish layer that can form on uncared-for brass. This not only detracts from the beauty of the metal but can also lead to corrosion if left unchecked.
- Maintains Antibacterial Properties: Brass, like its close cousin copper, has some inherent antibacterial properties. Keeping the surface clean may help to minimize the spread of germs on frequently touched surfaces.
- Enhances the Ambiance: Clean, polished brass reflects light beautifully, adding warmth and a touch of luxury to your home.
Identifying Solid Brass vs Brass-Plated
Whether you're dealing with solid brass or a brass-plated item, spotting the difference will help guide your cleaning approach and the products you use to keep your fixtures gleaming.
Solid Brass:
- Made entirely of a copper-zinc alloy, giving it a consistent golden yellow color throughout.
- Generally heavier and more durable than brass-plated items.
- More resistant to wear and tear, allowing for a wider range of cleaning methods.
Brass-Plated:
- Features a thin layer of brass applied to a base metal, often steel or iron that may appear slightly lighter in color than solid brass.
- More susceptible to chipping or wearing through the plating, revealing the base metal underneath.
- Requires a gentler cleaning approach to avoid damaging the plating.
How to Tell the Difference:
Identify solid brass vs. brass-plated items using:
- The Magnet Test: Solid brass is not magnetic. If a magnet sticks to your item, it's likely brass-plated over a ferrous metal.
- The Scratch Test (Use with Caution!): In a discreet area, gently scratch the surface with a sharp object like a paperclip. If the exposed metal is still a golden yellow, it's solid brass. If a different metal color appears beneath, it's likely plated.
Why Does it Matter?
Knowing if your brass is solid or plated affects the cleaning method you choose. Solid brass can handle harsher abrasives and polishes, while brass-plated items require gentler techniques to avoid damaging the plating.
Assessing Tarnish Level
Not all tarnish is created equal! Remember to assess the severity of the tarnish on your brass item which will help you determine the most appropriate cleaning method and the level of effort required.
Use these tarnish levels as your guide to restoration:
Light Tarnish:
- Appears as a dulling of the brass's natural shine, often with slight discoloration towards a yellowish or brownish hue.
- May be present in a patchy or uneven manner.
Light Tarnish Cleaning Approach:
This level usually responds well to gentle cleaning methods like homemade solutions or store-bought polishes designed for light tarnish. You may not even need a strong abrasive.
Moderate Tarnish:
- Characterized by a more prominent darkening of the brass surface, with a greenish or brownish cast.
- May appear more widespread and consistent across the item.
Moderate Tarnish Cleaning Approach:
You might need to step up your cleaning game with a slightly more abrasive polish or a store-bought product formulated for moderate tarnish. A soft cloth and some elbow grease may be necessary.
Heavy Tarnish:
- The brass appears very dark, with a heavy greenish or brownish tarnish layer obscuring most of the original golden color.
- May be accompanied by visible pitting or surface roughness.
Heavy Tarnish Cleaning Approach:
This level requires a more aggressive approach. Consider using a stronger abrasive polish or a commercial product specifically designed for heavy tarnish removal. Be prepared to put in some effort to restore the shine.
Beyond Tarnish:
In rare cases, what appears to be heavy tarnish might actually be a layer of lacquer or another coating (trickier to remove). If you suspect a coating, it's best to consult a professional to avoid damaging the brass.
DIY Cleaning Solutions for Brass
For those who like a natural approach, there are a few effective DIY solutions you can whip up with common household ingredients. Try these two popular methods to tackle tarnish and restore shine to your brass:
1. Homemade Paste (Flour and Vinegar):
This gentle yet effective paste is perfect for light to moderate tarnish.
Ingredients:
- 1/2 cup white vinegar
- 1 teaspoon table salt
- Flour (1 teaspoon, enough to form a paste)
Instructions:
- In a small bowl, combine the vinegar and salt. Stir until the salt dissolves.
- Gradually add flour, mixing until a thick paste forms. The consistency should be similar to kids’ model clay.
- Apply the paste to the brass using a soft cloth. Rub gently in a circular motion, focusing on tarnished areas.
- Let the paste sit for 10-15 minutes.
- Rinse the brass thoroughly with warm water and dry completely with a clean, soft cloth. Buff the surface with a dry microfiber cloth to restore shine.
Tips for a Streak-Free Finish:
- Use white vinegar; other types of vinegar may leave streaks.
- Ensure the brass is completely dry before buffing to prevent water spots.
- Rinse the cloth frequently as you clean to avoid spreading tarnish.
2. Lemon and Salt Method:
This natural option can be slightly more abrasive than the flour and vinegar paste.
Ingredients:
- 1 lemon, cut in half
- Table salt - 1 teaspoon
Instructions:
- Cut the lemon in half. Dip the cut side into the salt to create a slightly abrasive surface.
- Rub the lemon half over the tarnished brass, applying gentle pressure.
- Rinse the brass thoroughly with warm water and dry completely with a clean, soft cloth.
- Buff the surface with a dry microfiber cloth to restore shine.
A Word on Streaks:
The lemon juice may leave streaks on your brass. To minimize this:
- Rinse the brass frequently as you clean.
- Use a diluted lemon juice solution (mix equal parts lemon juice and water) for a gentler clean.
3. Lemon and Baking Soda
If you don't have salt on hand, you can substitute baking soda for a similar effect. Mix a tablespoon of baking soda with a ¼ cup lemon juice to form a paste, then follow the same cleaning instructions as with the lemon and salt method.
Remember, with both these DIY methods, it's always best to test them on an inconspicuous area of the brass first to ensure they don't cause any discoloration or damage.
Can I use ketchup to clean brass?
While you might stumble upon this tip online, it's generally not recommended to use ketchup to clean brass. Ketchup's acidity can indeed help break down tarnish, but it can also be harsh on the brass itself, especially with prolonged exposure, leading to etching or dulling of the surface.
The Best Way to Clean Brass
Before diving into specific cleaning methods, remember these general tips are applicable to all of your brass items.
- Always test first: Apply any cleaning solution to a hidden area of the brass to check for discoloration or unwanted effects before tackling the entire piece.
- Clean in sections: For larger items, work on one section at a time to avoid cleaners drying before you have a chance to buff.
- Go gentle: Unless dealing with heavy tarnish, a soft touch with a non-abrasive cloth is usually sufficient. Harsh scrubbing can damage the brass.
- Rinse thoroughly: Leaving cleaning residue behind can dull the shine and attract dust. Rinse well with clean water and dry completely.
- Buff for shine: A final buff with a dry microfiber cloth will leave your brass gleaming.
Delicate Brass Care
For antique or intricately designed brass items, extra care is needed. Make sure to:
- Avoid harsh abrasives: Skip steel wool or abrasive cleaners altogether. Opt for gentler methods like homemade pastes or polishes designed for delicate surfaces.
- Mind the details: For crevices or intricate designs, consider using a soft-bristled toothbrush to apply cleaning solutions and reach into nooks and crannies.
- Seek professional help: For truly valuable or irreplaceable brass items, consult a professional conservator to ensure proper cleaning and preservation.
Commercial Brass Cleaners: Pros and Cons
Commercial brass cleaners offer a convenient and often effective solution for cleaning brass. Before purchasing, get a clear view of the pros and cons.
Pros:
- Formulated for brass: Commercial cleaners are specifically designed to remove tarnish and restore shine to brass.
- Variety of options: You'll find cleaners for different types of brass and levels of tarnish, offering targeted solutions.
- Convenience: They're readily available and easy to use, often requiring minimal effort.
Cons:
- Harsh chemicals: Some commercial cleaners contain harsh chemicals that can damage delicate brass or leave behind strong odors.
- Trial and error: Finding the right cleaner for your specific brass might involve some trial and error.
- Cost: Commercial cleaners can be more expensive than DIY solutions.
Natural vs. Chemical Cleaners
When it comes to cleaning brass, you have two main choices: natural DIY solutions or commercially available chemical cleaners. Both have their merits and drawbacks, so let's explore them to help you decide which is best for your needs.
Effectiveness:
- Natural Cleaners: For light to moderate tarnish, DIY solutions like vinegar and flour paste or lemon and salt can be surprisingly effective. However, they may require more elbow grease and may not be as powerful for heavily tarnished brass.
- Chemical Cleaners: Commercial cleaners are often formulated for specific levels of tarnish removal. They can tackle heavy tarnish more effectively and may require less effort.
Environmental Impact:
- Natural Cleaners: These are generally eco-friendly as they utilize natural ingredients and are less likely to pollute waterways when rinsed down the drain.
- Chemical Cleaners: Many contain harsh chemicals that can be harmful to the environment if not disposed of properly. Look for eco-friendly options formulated with biodegradable ingredients.
Safety:
- Natural Cleaners: These are generally gentler and less likely to cause skin irritation or respiratory problems, making them a good choice for those with sensitivities or concerns about harsh chemicals.
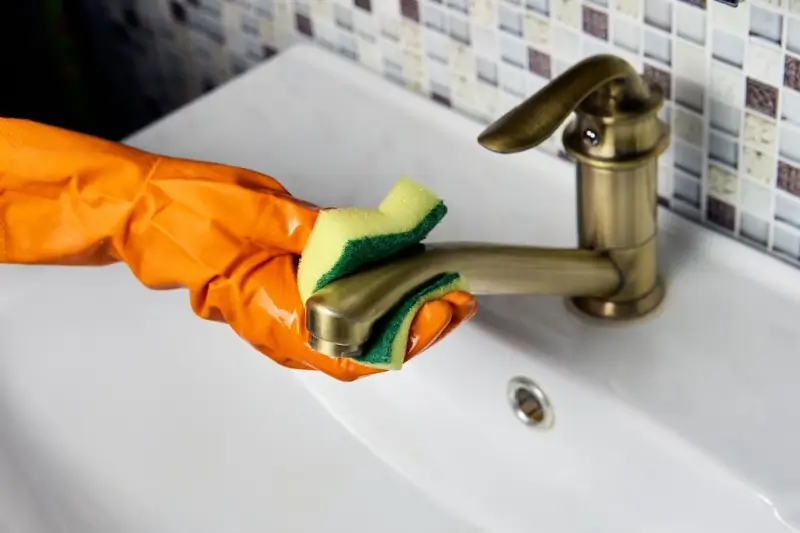
- Chemical Cleaners: Some may contain strong fumes or chemicals that can irritate skin, eyes, or lungs. Always wear gloves and ensure proper ventilation when using these products.
What Causes Brass Tarnish?
The dulling and discoloration you see on brass isn't dirt; it's a chemical reaction called tarnishing. Take a closer look at the science behind it:
The Culprit: Copper
Brass is an alloy, a mixture of metals, primarily copper and zinc. Copper is the more reactive metal in the mix. When exposed to air, the copper reacts with oxygen and moisture, forming a layer of copper oxide and copper sulfide. This layer is what gives tarnished brass its characteristic dull, greenish-brown appearance.
Environmental Influence
Certain environmental factors can accelerate tarnishing, including:
- Humidity: Moisture in the air speeds up the oxidation process. Areas with high humidity will see faster tarnish build-up.
- Pollutants: Exposure to air pollutants like sulfur dioxide can also contribute to tarnish formation. This is why brass doorknobs and other frequently touched surfaces often tarnish quicker.
Preventing Future Tarnish
Tarnish is inevitable, but there are steps you can take to slow it down and keep your brass looking its best for longer:
Proper Storage: When not in use, store your brass items in a cool, dry place with low humidity. Opt for airtight containers or display cabinets for valuable pieces.
Regular Polishing: Regular cleaning removes existing tarnish and creates a thin protective layer that can slow down future tarnishing. Consider polishing your brass every few weeks or months, depending on the environment.
Lacquer Coating: For a more long-term solution, consider applying a thin layer of lacquer. This clear coating acts as a barrier between the brass and the environment, significantly reducing the rate of tarnish. However, keep in mind that lacquer application may require professional help and can alter the appearance of the brass slightly.
Minimize Handling: Frequent handling can leave behind oils and residues that can accelerate tarnishing. For items like doorknobs, consider using clean cotton gloves when necessary.
Regular Cleaning Schedule
While occasional cleaning sessions can address visible tarnish, incorporating brass cleaning into your regular routine is key to maintaining its shine over time. Keep these benefits close at hand:
- Prevention is Key: Regular cleaning removes early signs of tarnish before it accumulates and becomes more difficult to tackle. This not only saves you effort but also helps prevent the tarnish from progressing into a layer that could damage the brass.
- Maintain the Luster: Brass naturally tarnishes, but consistent cleaning prevents a dull, lackluster appearance and keeps your brass items looking their best.
- Easier Upkeep: Frequent cleaning with gentle methods is easier than tackling heavy tarnish build-up later. A quick wipe-down every few weeks is far less time-consuming than a thorough cleaning session with strong polishes or solutions.
Establishing a regular cleaning routine will save you both time and energy; a quick wipe-down every few weeks is far less effort than tackling a heavily tarnished piece that requires a more intensive approach.
Professional House Cleaning Services from Molly Maid
Need help managing your overall house cleaning routine? Let Molly Maid tackle the chores. You can rest assured they’ll get the job done and done well. Professional home cleaning services can take care of a variety of housekeeping tasks, freeing up your time and energy for the things that matter most. Since Molly Maid is a Neighborly partner, all work is backed by the Neighborly Done Right Promise®. Request a free estimate today.
FAQ About Cleaning Brass
Can I use ketchup to clean brass?
While you might stumble upon this tip online, it's generally not recommended to use ketchup to clean brass. Ketchup's acidity can indeed help break down tarnish, but it can also be harsh on the brass itself, especially with prolonged exposure, leading to etching or dulling of the surface. Also, the consistency of ketchup makes it difficult to apply evenly (leaving a streaky finish) plus the sugars can attract additional dirt and dust, which cancels out the cleaning benefits entirely.
Can I use commercial brass cleaners?
Yes, commercial brass cleaners are available and can be effective for removing tarnish. However, it's important to follow the manufacturer's instructions carefully and test the cleaner on a small, inconspicuous area first to ensure compatibility with the brass surface.
What household items can I use to clean brass?
Several household items can be used to clean brass effectively, including lemon juice, vinegar, baking soda, and ketchup. These items contain acidic properties that help break down tarnish and restore the shine to brass surfaces.
Is it safe to use abrasive materials on brass?
It's generally not recommended to use abrasive materials, such as steel wool or abrasive brushes, on brass surfaces, as they can scratch and damage the metal. Instead, opt for soft cloths or brushes made of gentle materials like nylon to avoid causing harm to the brass.
How do I prevent brass from tarnishing in the future?
To prevent brass from tarnishing, it's essential to keep it clean and dry, as moisture and dirt can accelerate tarnishing. Applying a thin coat of clear lacquer or wax can also help protect brass surfaces from tarnish and oxidation. Additionally, storing brass items in a dry, low-humidity environment can help prolong their shine.